Site kit is an amazing WordPress Plugin developed and offered by Google. Site kit integrates all google essential products in one bucket. First of all we try to explore some basic questions arise by WordPress users and then we explain how to install and configure the Google Site kit WordPress Plugin.
Not interested about Q & A ?
Click here to skip and got to the installation and configuration section
Frequently Asked Questions
What is Site Kit Plugin?
Site kit is a WordPress Plugin developed by Google itself. It contains 4 most useful google tools (Search Console, Analytics, AdSense, PageSpeed Insights) in one.
Is Site Kit a free plugin?
Yes. It is absolutely free for everyone. Google Promises that it will always be free.
Why I can’t find Site Kit from WordPress Plugin Archive?
You can’t find because the plugin is available only in BETA version.
Does BETA version work well?
As per my experience, yes it is working well
How do I download Google Site Kit plugin?
You can find the plugin from the site kit official page sitekit.withgoogle.com or you can click here to direct download the plugin.
I am using MonsterInsights. Is it necessary to deactivate or uninstall the plugin?
No. it is not necessary to uninstall. You can use site kit with all others analytic plugin.
Is the plugin lightweight?
If you consider 2.2 MB is lightweight for a multipurpose plugin, than it is.
How to Install Google Site Kit Plugin
Step by step guide
Step 1
Download the plugin from the site kit official page sitekit.withgoogle.com or click here to download directly
Step 2
Go to your wordpress dashboard. Havourover on Plugin tab> Click on the Add new

Step 3
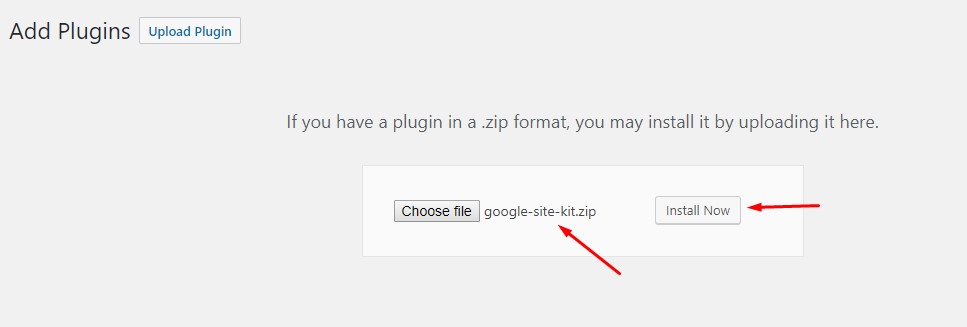
Click on Upload > Browse the zip file of Site kit plugin that you download early or drug and drop the zip file on it> click on Install now
Step 4
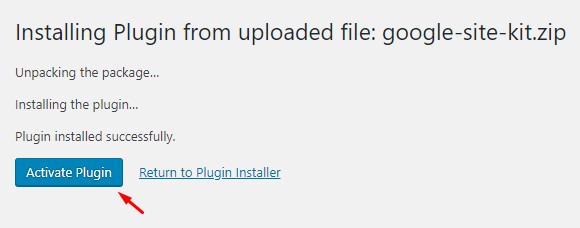
Click on Activate Plugin
Yessss! Done.
You Find a banner ‘Congratulations, the Site Kit plugin is now activated’

How to Setup Google Site Kit Plugin
Step by step guide
Step 1
After successful installation you find a banner where you find a START SETUP button. Click on it.
Step 2

You find a 6 steps Process Dashboard. Don’t worry it is so simple, just click through properly. In this page you are asking for a client configuration. click on the link

Step 3
After clicking the link you are redirected to a new page where you find your a button GET OAUTH CREDENTIAL. Click on it
Step 4
You are asking for login to gmail account. Put the email ID and Password.
Step 5
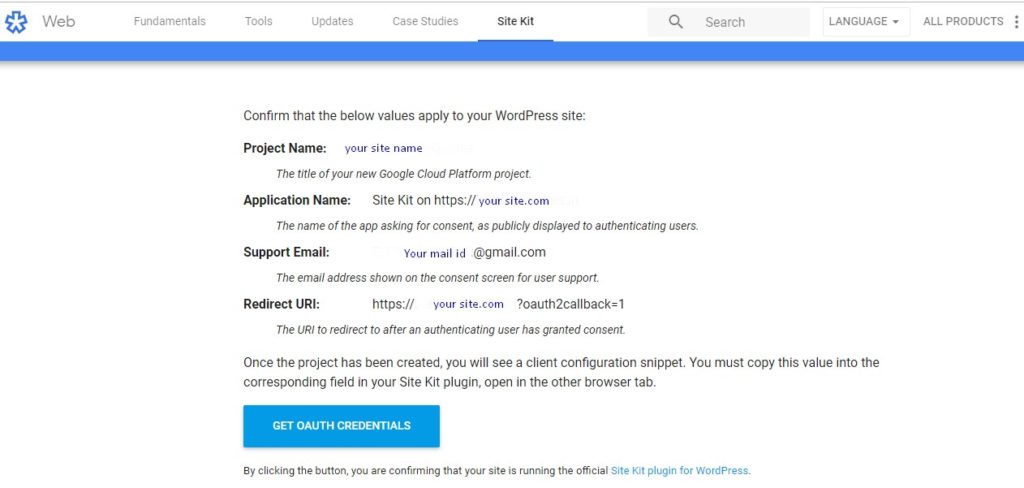
Page will redirect on previous page and you find all some detail of your site. Bottom of this detail you find GET OAUTH CREDENTIAL button. Click on it
Step 6
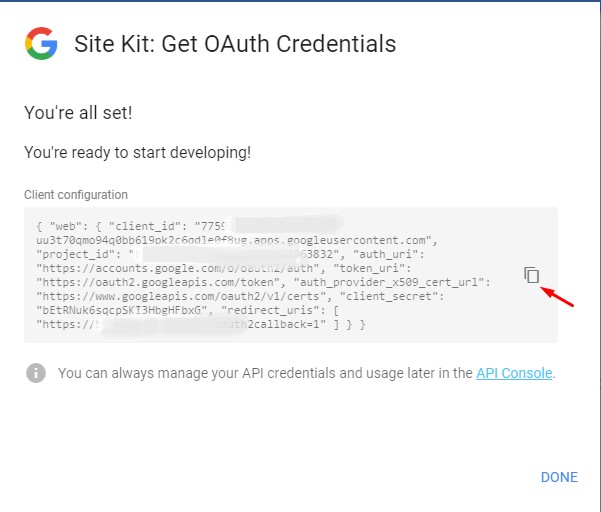
A popup window arise and display your oauth credential code. Copy all the code by pressing ctrl+c or click on the copy icon right side the popup.
Step 7
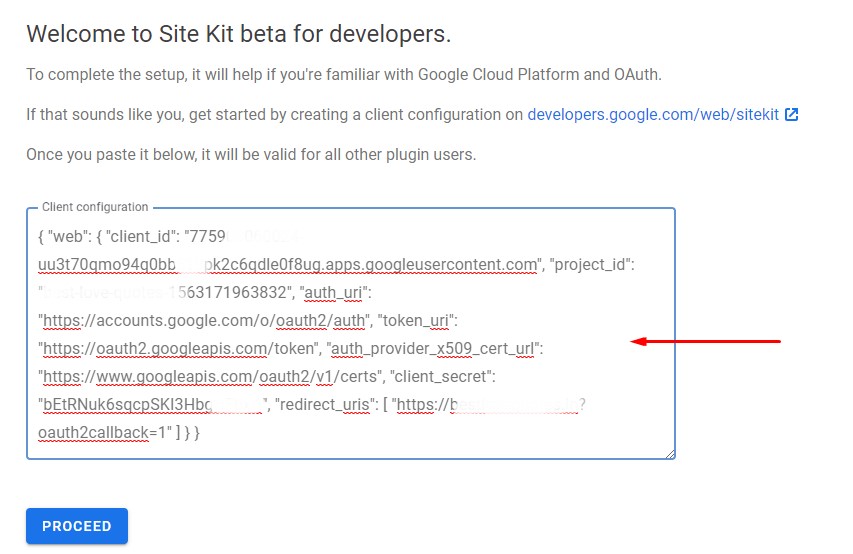
Go back to your dashboard and past the code on the Client Configuration Box. Click on PROCEED
Step 8
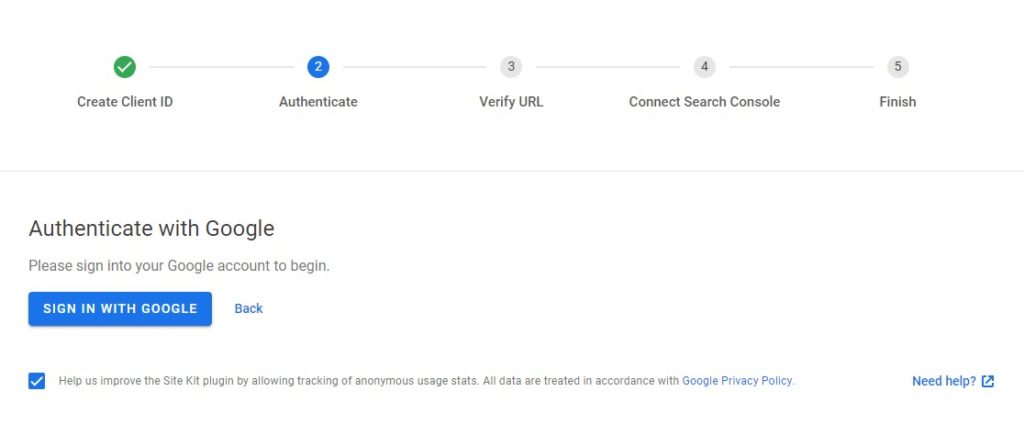
You will find green tick mark on Create Client ID button of 6 steps timeline. Now you are asking for authenticating with google. Click on SIGN IN WITH GOOGLE button
Step 9
You are redirected to google sign-in page. Put your Gmail ID and password
Step 10
Allow all the permission asking on popup window
Step 11
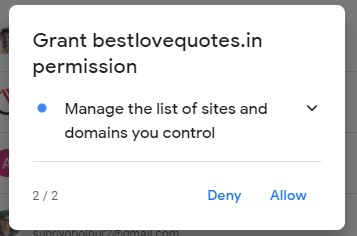
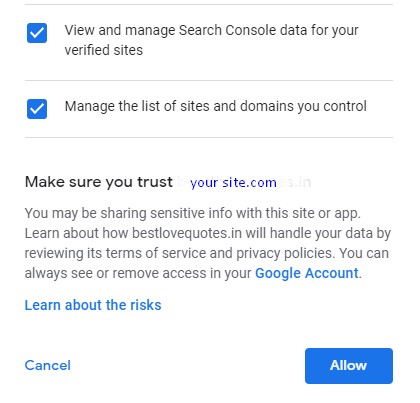
You are asking again for ‘View and manage Search Console data for your verified sites’ and ‘Manage the list of sites and domains you control’ allow it.
Step 12
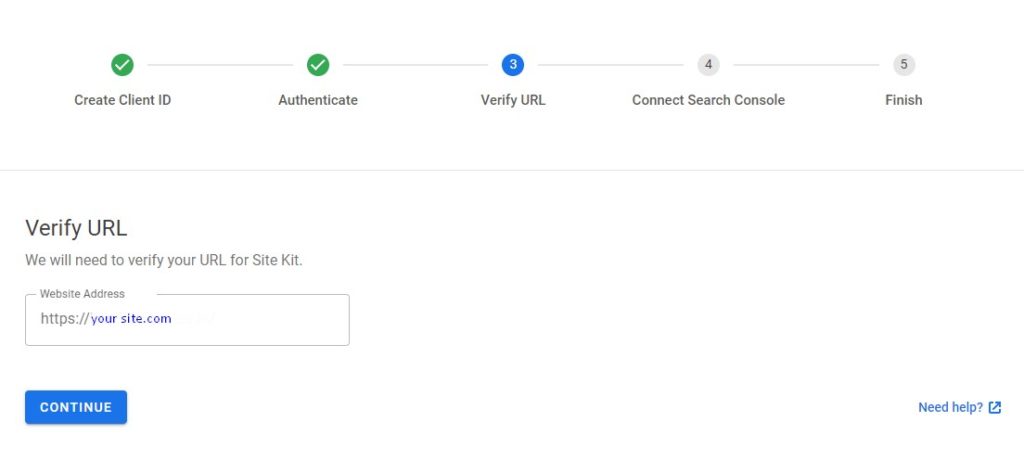
After allowing it you are redirected to your dashboard and asking for url verification. You find your website address automatically filled up. You have to just click on CONTINUE button. Click on it
Yessss ! You got it.
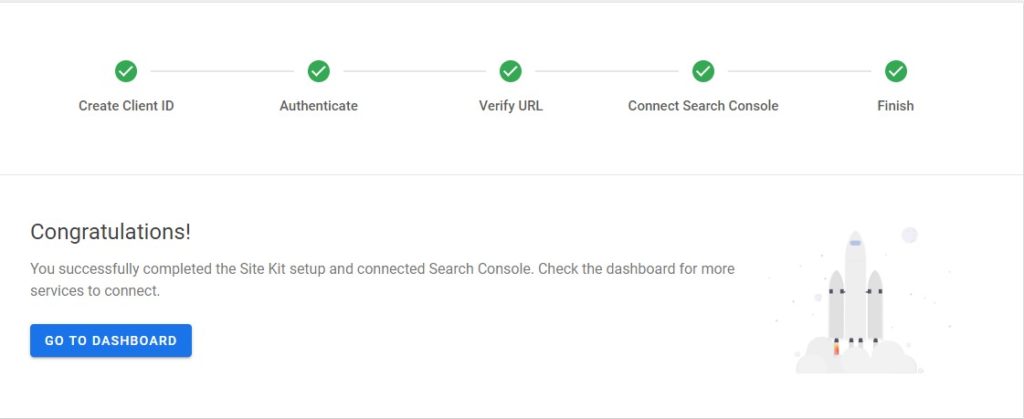
You will find a congratulation message. All the tab of your 6 steps timeline became green. Now you may go to the dashboard for further configuration
Site kit is a very useful plugin for me. Google product always makes something innovative and new. Hope Site kit makes the same in future. What do you think about site kit? put your comments bellow. Thank you.

